
How to Fix Garage Door Sensor Problems
You press the garage door button and expect the door to close. Instead, it starts moving down, stops, and goes back up. Sometimes it will not move down at all.
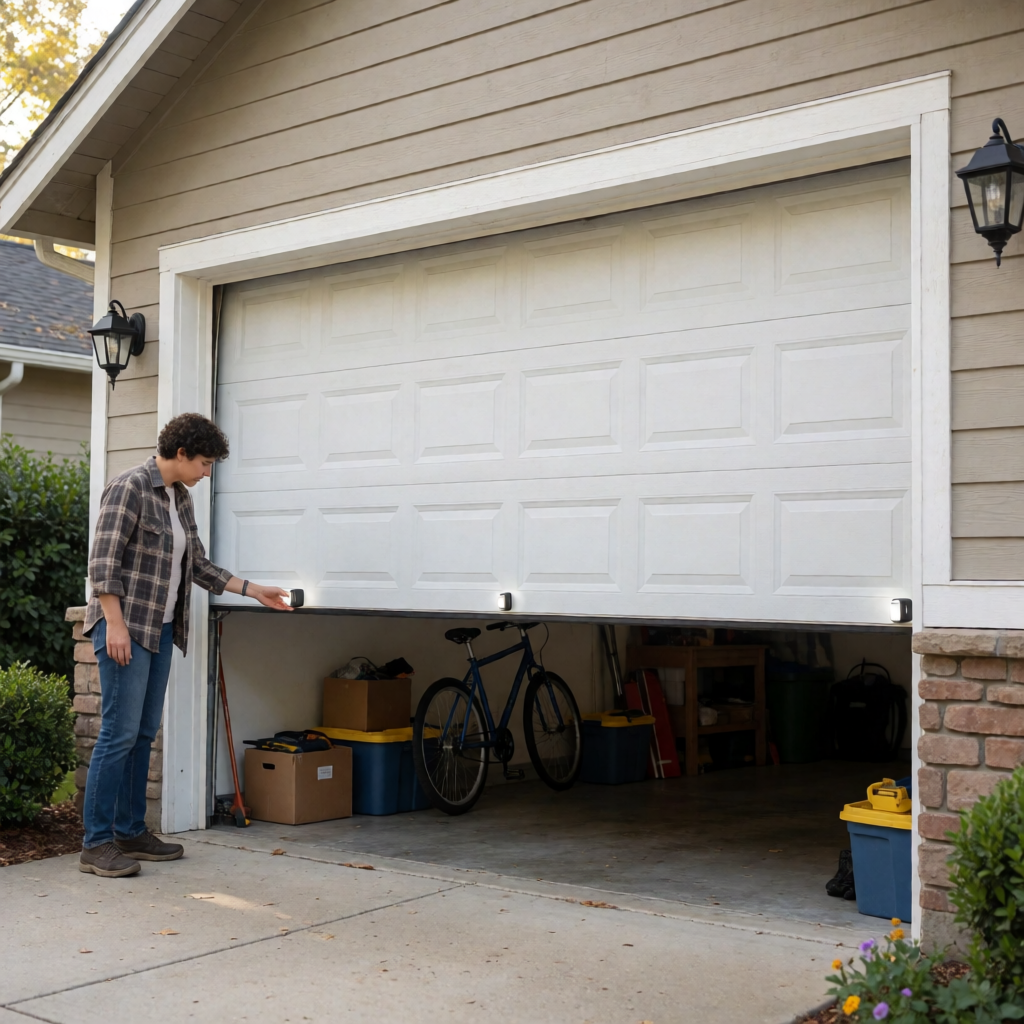
Before assuming that the garage door opener has failed, take a look at the two small sensor units near the bottom of the doorway. These are the safety sensors, sometimes called photo eyes. They work together across the opening and tell the opener whether the path is clear.
A dirty lens, a sensor that has been knocked out of position, an object blocking the beam, or a wiring problem can make the opener believe something is in the way.
The good news is that several sensor problems can be checked and corrected by a homeowner without replacing the entire garage door opener.
The Problem: My Garage Door Won’t Close Because of the Sensors
A sensor problem often has a very recognizable pattern.
You press the wall control or remote. The door begins to close but immediately returns upward, or the opener refuses to close the door.
You may also notice that one of the small indicator lights on the sensors is off or behaving differently from the other one.
The exact light colour varies between manufacturers, so do not assume that a green, red, amber, or blinking light means the same thing on every opener. Your owner’s manual is the best reference for your particular model.
The important point is that both sensors need to communicate properly for the safety system to allow normal closing.
Why Are My Garage Door Sensors Not Working?
Several simple problems can interfere with the sensor system.
Something is blocking the beam
Start with the obvious possibility.
A storage box, broom, tool, bicycle wheel, piece of cardboard, or even a pile of debris can cross the area between the two sensors.
Because the beam is invisible, an obstruction is not always immediately obvious.
Look across the doorway at sensor level and make sure nothing is crossing the path.
One sensor was bumped out of position
The sensors are mounted close to the floor, which makes them easy to hit.
A bicycle, vehicle, garbage bin, shovel, or even a foot can move a bracket slightly.
The sensor may still look as though it is pointing in the right direction, but being slightly off can prevent the two units from communicating.
The sensor lenses are dirty
Garage environments can be dusty.
Cobwebs, dirt, road dust, moisture, and other residue can accumulate around the small lenses.
The sensors may still be powered, but the beam may not be detected correctly.
The wiring has been damaged
The small wires running to the sensors can become loose, pinched, damaged, or disconnected.
Look especially carefully where the wires run along the wall and near the opener.
Do not pull on the wires or start changing connections unless you are following the instructions for your exact opener.
Direct sunlight is confusing the receiver
Sometimes the sensors work normally in the morning but refuse to close the door later in the day.
Strong sunlight aimed directly toward the receiving sensor can interfere with the infrared signal.
If the problem appears only at a particular time of day, sunlight is worth considering.
The problem may not actually be the sensors
A garage door can reverse for reasons unrelated to the photo-eye system.
Mechanical resistance, track problems, incorrect opener settings, or a door that is not moving normally can also cause reversal.
That is why it is better to start with simple observations instead of immediately replacing the sensors.
Simple Checks Before Replacing Anything
You can learn quite a lot without taking the opener apart.
Watch what the door does
Try closing the door normally.
Pay attention to the exact behaviour.
Does it refuse to move?
Does it travel a few inches and reverse?
Does it go almost all the way down before returning?
That information can help narrow down the problem.
Look at both sensor lights
Stand near the doorway and inspect the indicator on each sensor.
Compare the two.
If one is dark or behaves differently, check the manufacturer’s instructions for what that signal means.
Do not assume that a particular colour has the same meaning on every brand.
Clear the area between the sensors
Look along the entire space between the two units.
Move anything that could interfere with the beam.
Do not forget about objects that sit very low to the ground.
Examine the sensor brackets
Stand back and look at both sensors.
They should appear to face each other rather than one pointing toward the floor, ceiling, wall, or side of the garage.
If one bracket looks noticeably different from the other, it may have been knocked out of position.
Clean both lenses
Use a clean, soft cloth to gently wipe the visible lens on each sensor.
Avoid scratching the plastic.
You do not need harsh chemicals or complicated cleaning products.
After cleaning, check the indicator lights again.
Inspect the visible wiring
Follow the sensor wires as far as you can safely see them.
Look for:
- obvious cuts
- crushed sections
- loose connections
- wires pulled away from their mounting points
- damage caused by pests
- staples or fasteners that appear to have damaged the wire
If you find damaged wiring, do not keep operating the system as though nothing is wrong.
DIY Solution: Realign and Clean the Garage Door Sensors
If the sensors appear dirty or slightly misaligned, you can usually start with a simple adjustment.
Step 1: Make the doorway clear
Remove boxes, tools, bikes, toys, and anything else near the sensor beam.
Keep people and pets away from the moving door while you are testing it.
Step 2: Clean both sensor lenses
Gently wipe each lens with a soft, dry or slightly appropriate cloth according to the opener manufacturer’s instructions.
The goal is simply to remove dust, cobwebs, or film that may be interfering with the signal.
Step 3: Check the alignment
Look directly across the doorway.
Both sensors should be aimed toward each other.
If one has been knocked sideways or tilted, carefully reposition it.
Some sensor brackets use a wing nut or similar fastener that can be loosened slightly for adjustment. Do not force the hardware if your particular mounting system is different.
Step 4: Watch the indicator
After repositioning the sensor, check the indicator light.
The desired indication varies by manufacturer, so use the owner’s manual to confirm what a normal signal looks like.
If the indicator becomes stable and the opener behaves normally, try operating the door again.
Step 5: Test the door
Stand clear of the moving door and use the normal wall control.
If it closes normally, observe it through the entire cycle.
Do not assume the repair is complete simply because the door moved once.
Run the opener again and make sure the problem has actually disappeared.
Step 6: Test the safety system
The sensors are part of the garage door’s safety system, so they should not simply be bypassed because the door is inconvenient to operate.
Your opener’s manual should explain how to test the safety reversal system correctly.
The U.S. Consumer Product Safety Commission recommends regular testing of garage door opener reversing mechanisms and warns that an opener that does not reverse properly can present a serious entrapment hazard.
If your opener fails its required safety test, stop using it until the problem has been corrected.
What Not to Do
Do not bypass the sensors
You may find instructions online telling you how to disconnect, cover, or bypass the safety sensors.
Do not do this.
The sensors exist to prevent the door from closing when something is in its path.
A door that works only after the safety system has been defeated is not properly repaired.
Do not tape a sensor in a random position
Holding a sensor in place with tape may seem like a quick solution.
If the bracket is loose or damaged, the better approach is to correct the mounting problem.
The sensor needs to remain correctly positioned when the door operates.
Do not keep increasing force settings to solve a sensor problem
If the opener is reversing, changing force settings without understanding the cause can create another safety problem.
Start with the sensors, the door path, and the manufacturer’s troubleshooting instructions.
Do not pull or cut the sensor wires
A damaged wire may be the reason the system is failing.
Cutting it without knowing the wiring arrangement can turn a simple fault into a more complicated repair.
Do not work underneath a moving garage door
Never place your body under a door that is being tested.
Keep children and pets away from the area while troubleshooting.
Do not replace the entire opener immediately
A sensor problem does not automatically mean the motor unit has failed.
Cleaning, alignment, an obstruction, or a damaged connection may be all that is needed.
When Should I Call for Help?
Some sensor problems are reasonable DIY checks.
Others are better left to a garage door professional.
Get help if:
- the sensors remain faulty after cleaning and alignment
- the indicator lights do not behave normally according to the manual
- the wiring is damaged or difficult to access
- the sensor brackets are broken
- the door is binding or moving unevenly
- the door makes unusual noises
- the door appears unusually heavy
- the opener repeatedly reverses after the sensor issue has been ruled out
- the safety reversal test fails
- you suspect a problem with springs, cables, or other loaded components
Garage door springs and cables can store substantial mechanical energy. They are not good candidates for experimentation if you are not trained to work on them.
A sensor issue is one thing. A door that is mechanically unsafe is another.
Quick Garage Door Sensor Checklist
Before buying replacement parts, work through this list:
- Clear everything from the sensor path.
- Check both sensor indicator lights.
- Compare the position of the two sensors.
- Look for a bracket that has been knocked sideways.
- Clean both sensor lenses.
- Inspect visible sensor wiring.
- Look for damaged or pinched wires.
- Consider whether direct sunlight is affecting the receiver.
- Check the opener manual for the meaning of the indicator lights.
- Test the door after making the correction.
- Confirm that the safety reversal system works correctly.
- Do not bypass the sensors.
- Call for help if the problem involves springs, cables, damaged hardware, or a failed safety test.
Bottom Line
When a garage door suddenly refuses to close, the small safety sensors near the floor are one of the first places worth checking.
A blocked beam, dirty lens, shifted bracket, damaged wire, or strong sunlight can prevent the opener from receiving the signal it expects.
Start with the easy checks. Clear the doorway, clean the lenses, inspect the sensor position, and look at the visible wiring.
If the sensors still do not work correctly, do not defeat the safety system just to make the door close.
The goal is not simply to get the garage door moving again. The goal is to have it close while its safety features are working as intended.